ABS
| Time, Total Time, Cost, First-Time Cost | 15min-1hr $10-150, $5-15 |
| Number of Persons | 1 |
| Difficulty level | 5 |
| Tools | turkey baster |
| Special Tools | Bleeder T Wrench, Motor Switch, Solenoid Switch |
| Special Parts | fluid (1/2-1 liter) |
| Service Manual Pages | 19-65, 19-69 |
| Service Interval | 2 years or 30,000 miles |
| Prerequisite | None |
| THE FAQ at www.nsxprime.com |
The NSX anti-lock brake system was one of the first four-wheel independent systems ever produced. Most of the time it works beautifully. Sometimes though, it acts up--this is typically due to lack of maintenance and use. One of the best things we can do to prevent malfunction is exercise the system monthly. By "exercise" I mean go out and engage the system by stopping hard on a wet parking lot, loose gravel, snow, ice... Be careful when you do your exercising, do it slowly and in an open area.
The other thing we can do to help prevent malfunction is flush the system at least yearly. Make sure your new fluid is DOT 3 or DOT 4 and it can be different type and brand than the fluid in your other system as the fluid from the ABS does not mix with the fluid from the non-ABS braking system. Flushing the system can be a fun DIY project if you're willing to spend some money on a special tool (optional) and assemble a set of wiring switches and connectors.
Troubleshooting
If your system is not working properly, these steps below should have a good
chance of fixing your problem. Old and dirty fluid will not lubricate the solenoids
properly and will cause these solenoids to stick open. When this happens,
the ABS motor cannot pressurize the system and the pump will run for about 120 seconds and then shut off and the yellow ABS light will come on in the
dashboard. This is usually accompanied by a bunch of brake fluid
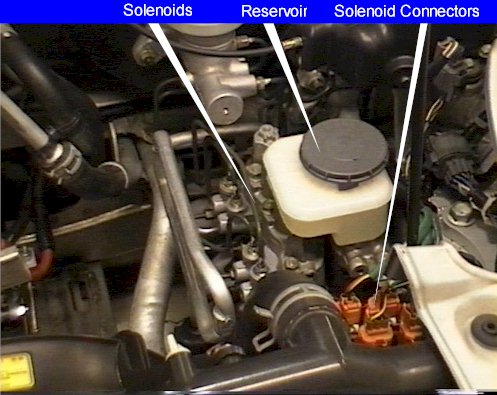
splattered around the ABS reservoir. What happens is a solenoid valve
(normally when activated is only open for a short period of time to kick back
the brake pedal) sticks open and the fluid in the accumulator which is under
pressure blows out the top of the reservoir.
Flushing the ABS/Solenoids/Troubleshooting
Prepare Tools
Special Tool: Bleeder T
Wrench, Motor Switch
.jpg)
Motor Switch
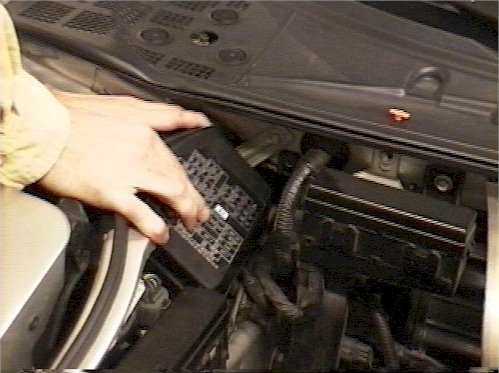
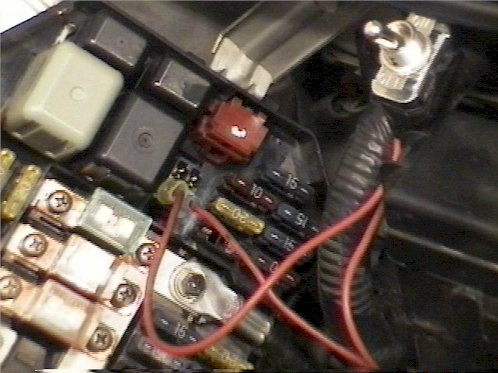
1. Remove the front fuse box cover (located on the passenger's side).

2. If your system is not working properly, check the three fuses for continuity.
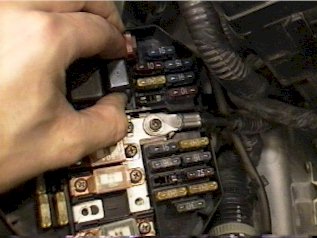
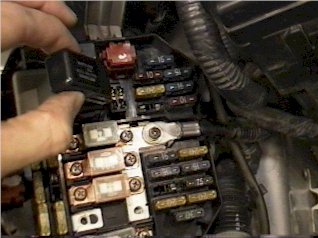
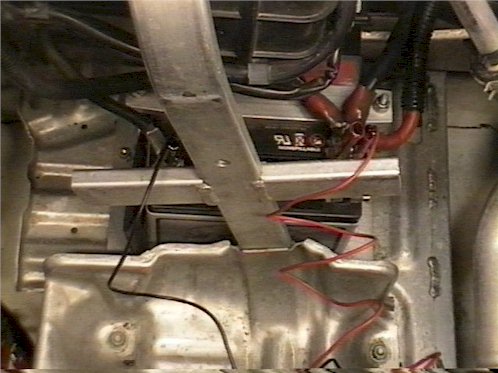
3. Remove the motor relay from the fuse box.
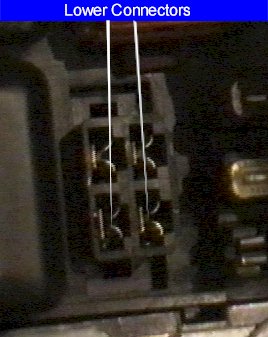
4. Connect the Motor Switch to the LOWER terminals of the relay socket.
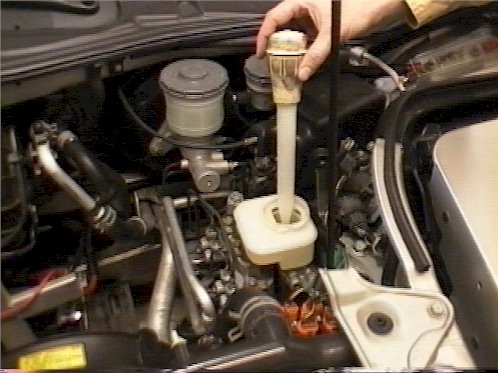
5. Suck out the crappy fluid from the reservoir with the turkey baster and refill the reservoir with new brake fluid.
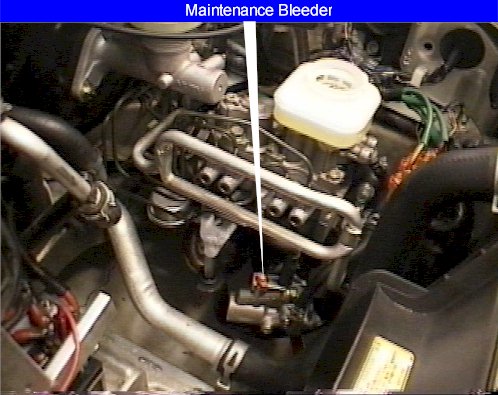
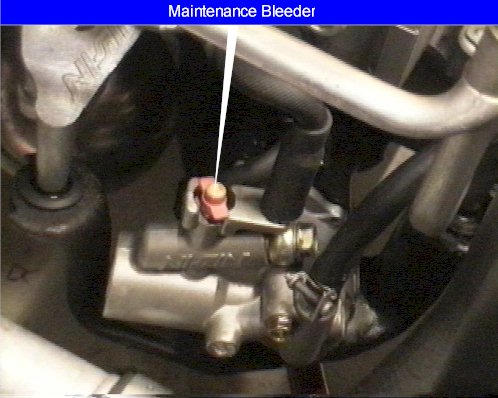
6. Place the Bleeder T Wrench over the maintenance bleed screw and turn slowly until the brake fluid stops flowing.
7. Lightly close the bleed screw (4 lb-ft) and close the Motor Relay Switch until the fluid is sucked out the the reservoir but don't run the motor more than 30 seconds. We are bypassing the pressure switch so over-running the motor will cause it to smoke. It's about $250 for a new one, pretty easy DIY install though <g>. The motor will start slowing when the fluid is under pressure.
8. Repeat steps 6 and 7 until you are almost out of brake fluid.
9. Reinstall the motor relay (copper terminals down) and fuse box cover. Put top back on ABS reservoir.
10. Go out and carefully exercise the ABS system. Your ABS motor will probably run once the car starts moving, this is normal. Fill the reservoir to the MAX line when you return home. Good Luck!
This procedure can be used to flush the ABS system if you don't happen to have the Bleeder T Wrench.
If your ABS light is on steady in the dash then odds are you have a stuck solenoid. The steps below should un-stick the pesky solenoid.
Prepare Tools
.jpg)
Solenoid Flush Tools
1. Hook up the ABS Motor Switch (See step 1-4 above)
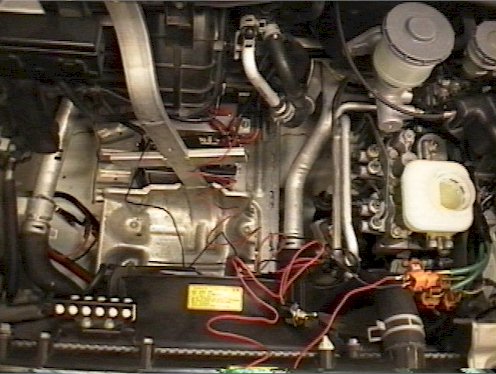
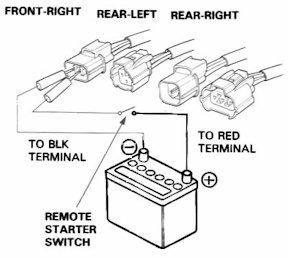
2. Hook up the Solenoid Flush Wires to the battery. Keep the free ends from touching each other and the positive one from touching ground.
Male Connector
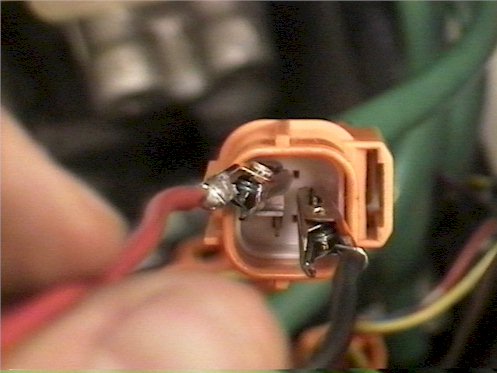
3. Unhook one of the four orange solenoid connectors. The connectors have a tab which releases it from its mount and another tab to separate the connector. Each connector has a different configuration so you'll have to be careful to hook up the proper wires. Once the connectors are apart find the half with the large red, black and yellow wires (only). If the connector is male, then use the alligator clips to hook the red to the tab that goes to the red wire and the black to the black wire (above).
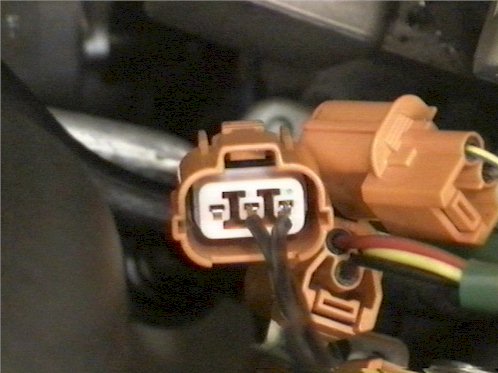
Female Connector
If the connector is female, then use the short "probe" type wires and insert them into the connector. Hook the proper alligator clip to the other end of these wires. Red to red, black to black.
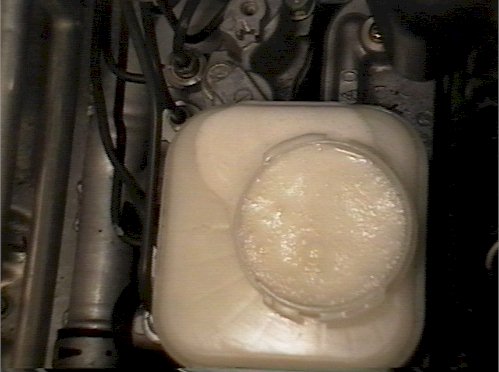
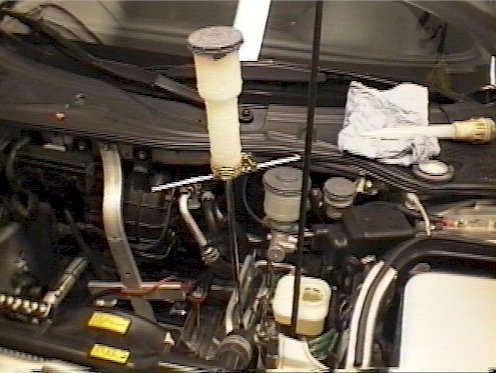
4. Rapidly, close and open the Solenoid Switch several times and watch the reservoir, fluid should flow from the solenoid return tube located in the base if the reservoir. Be careful not to keep the switch open too long or it will overflow like in the photo above <g>.
5. Once the fluid is almost at the top of the reservoir, you can either suck out the fluid with the turkey baster if you see debris floating around, or keep the fluid in if it's new and clean.
6. If you sucked out the fluid, replace with new fluid. Run the Motor Switch for about 25 seconds to suck the fluid from the reservoir to the accumulator. Add fluid if necessary. Be careful not to run the ABS Motor for more than 30 seconds. Switch it off once it starts to slow down. You may want to repeat step 4 to work this solenoid more if you are getting debris.
7. Repeat steps 3-6 for the remaining (3) solenoids.
8. Go out and carefully exercise the ABS system about 10 times and refill the reservoir to the max line after each stop.